Drywall Repair Mesa AZ is an important home improvement project that will add value to your property. While it is a challenging project, you can tackle it with the right tools and materials.
For minor damage, such as small dents or nail holes, spackle is a simple and affordable solution. For more extensive damage, replacing sections of drywall will be necessary.
Drywall isn’t indestructible, but it is pretty tough and able to take most things that happen around your home. Whether it’s your kids flinging their toys or a doorknob hitting the wall, minor dents can be easily repaired by filling them with spackle or joint compound and then sanding and painting. However, if you notice cracks or significant damage that goes beyond the drywall, it’s time to call in a professional drywall contractor.
Identifying signs of drywall repair needs is simple if you know what to look for. First, examine the surface of your walls for scuffs and dings, especially in areas where the wall meets trim or other surfaces. Cracks that widen over time, cracks that occur along with sagging walls or ceilings and stains all indicate a need for drywall repair.
You should also check for any areas of water damage, which will manifest as swollen or soft spots in the drywall. Water damage is a serious issue that can compromise the structural integrity of your walls and lead to mold and mildew growth. This can be caused by plumbing and roof leaks, clogged gutters, appliance failure or even just high humidity levels.
Finally, you should check for any signs of pests or rodents in your drywall. Gaps in the drywall can be an easy highway for pests and rodents to enter your home, so it’s important to address them as soon as possible. If you see hollow sounds, bubbling paint or other indications of pests behind your drywall, you’ll need to remove the damaged section of the wall and install a new piece to seal the gap. Then, sand and paint the replacement to match the rest of the wall.
Gathering the Materials
When you are ready to begin the repair process it is important that you have all of your materials in place. This will include the drywall patch, drywall screws, a putty knife, a spreader tool or a sanding sponge, sandpaper or fine-grit steel wool, and joint compound (also known as mud). It is also a good idea to have a bucket of water handy to keep you from getting too dusty while working.
It is best to start with a small hole, this will make it easier to get it looking right. It is also a good idea to cut the edges of the damaged area so it will not be as noticeable.
Once you have your drywall patch in place you will need to cover it with a thin coat of mud. You can mix your own or purchase a premixed version. Either way it is a good idea to follow the manufacturer’s instructions. Once this layer is dry sand it smooth and apply a second coat.
If you are fixing a large hole, you may need to use a pre-cut drywall patch. This is usually a bit larger than the hole in order to make it easier to blend in. For smaller holes you can use a drywall patch kit that includes a self-adhesive patch, sanding sponge and joint compound.
You can also find drywall patches and joint compound that are low in volatile organic compounds which can improve indoor air quality. Another option is to choose a moisture-resistant drywall, also known as green board, which can help prevent mold and mildew. If you are in a damp area it is a good idea to install dehumidifiers and exhaust fans.
Preparing the Surface
Drywall is pretty tough stuff, but it’s not indestructible. Whether from a nail popping or a run-in with the vacuum cleaner or a child flinging a toy, it’s not uncommon for homeowners to find themselves patching holes in their walls. Luckily, most repairs are easy and quick to do with the right materials.
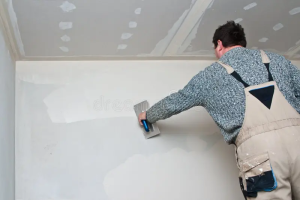
To prepare for the repair, start by cleaning the area around the damaged surface. Then, use a utility knife to remove any loose or flaking bits of drywall. Once the area is clean, apply a coat of mud to the surface and allow it to dry. This step is critical for creating a smooth base and minimizing the visibility of the patch.
Next, it’s time to sand the repaired area to remove any visible marks or uneven surfaces. For smaller repairs, a handheld sanding block may work well, but larger areas often call for a sander or pole sander. When sanding, be sure to use circular motions. This distributes the pressure evenly and helps avoid noticeable patterns in the drywall. It’s also important to feather the edges of the repair to create a seamless transition with the existing wall surface.
For any dents that require more than just sanding, you’ll need to consider using a drywall dent filler. This is a specialized material that looks and acts like a cross between spackle and caulk. It can be used to fill dents and cracks before applying a coat of joint compound or paint.
One of the most challenging aspects of drywall repair is matching the texture to the surrounding wall. This can be done with a texture sprayer or by hand, but it requires patience and a good eye for detail.
Applying the Patching Compound
Drywall patching is easy with the right products and techniques. Whether it’s small nail holes or large cracks, a few simple steps can help you get the surfaces looking like new again.
First, apply a thin coat of spackle or joint compound to the damaged area with a putty knife. You’ll want to make sure the surface is completely smooth and even, so it blends in with the rest of the wall. If necessary, apply a second coat and sand again until smooth. Once the repair is finished, you can repaint the surface to match the surrounding walls.
When repairing larger holes in drywall, you may need to use more than just the basic spackling compound. If the hole is large, you’ll probably also need to use aluminum or fiberglass mesh tape and a patch cut from another piece of drywall material to strengthen the drywall, reduce shifting, and prevent future holes. You’ll also need to use a drywall saw to cut the new patch to size, then add it to the hole.
Using too much compound
The key to success with any drywall repair is to apply the correct amount of compound for the job. Overfilling a hole can lead to sloppy, uneven surfaces that are difficult to sand. Similarly, underfilling can result in a weak and brittle surface that is more likely to crack or separate from the existing wall.
To avoid this, it’s important to follow the manufacturer’s directions for application and drying times. It’s also best to work in layers if possible and to always sand between applications. Finally, don’t skip sanding — it’s essential to a good finish and helps the patched areas blend in with the rest of the wall.
Finishing
There are a lot of things that can go wrong with your home’s walls. Whether it’s nail holes, light scratches and dents from wall hangings or deep cracks that occur naturally from settling or unwelcome water damage, there is no doubt that at some point in the life of your home you will need to perform a drywall repair.
Small blemishes, such as nail holes and minor dents can often be corrected with spackle and a bit of paint that matches the wall. For larger issues, a drywall patch kit will likely be required.
Regardless of the extent of the damage, preparing the area before you start is essential for a successful repair. The surface must be clean and free of debris to ensure that the patch will adhere properly. This step also helps prevent further damage to the surrounding areas. For this, a utility knife is often used to remove any loose sections of the drywall or plaster. Then, the edges of the damaged area will need to be smoothed and sanded down to allow the new patch to blend in with the existing wall.
Once the sanding and smoothing is complete, you will then need to apply a coat of joint compound over the mesh. This should be applied liberally, and then lightly sanded down again to create a smooth finish that will be ready to be painted.
This is a fairly straightforward process, and many homeowners will find that they can handle this type of project themselves. However, if the extent of the damage is more extensive or if you would like to be sure that your repair job is done correctly and professionally, it may be best to contact a professional.